One of the most powerful features of the new Gutenberg editor is the Query Loop Block. It allows you to query the database of content on your site and output the results of that query in a customizable way. UBC folks have been using the Query Loop Block for a whole manner of reasons including a ‘related posts’ style where the block can show other posts in the same category as the one being shown, or listing their student, faculty, or staff profiles on their websites.
A common issue we heard from users is the native sort and filter functionality within the block is quite limited. You can only filter by taxonomy or author, and only filter by ascending or descending. This works for some common scenarios, however, for anything more complex, it falls short.
We have developed, and made publicly available, several add-ons to the Query Loop block which allow content creators to display, filter, and/or sort by custom fields (and their associated values).
Custom Field Block
The custom field block allows you to display the value of any custom field on your post or page. This works as a standalone block meaning you can use it outside of a Query Loop Block should you wish, but it becomes super powerful when used in a Query Loop Block’s template. This means you’re able to display the value of a custom field for each post that is being shown with a Query Loop Block.
To use this block, enable the Custom Field Block plugin from the Plugins menu on your site’s dashboard. Now edit or add a post or page. If your content already has custom fields added to it, you are able to get started with this block right away. If it hasn’t, see our instructions on how to add the Custom Fields panel below.
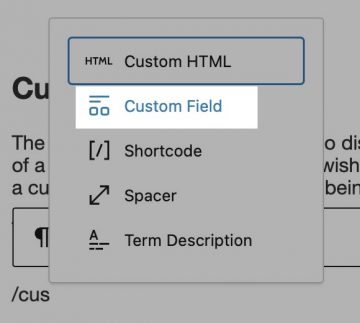
Add the Custom Field Block using either the block inserter or the slash command.
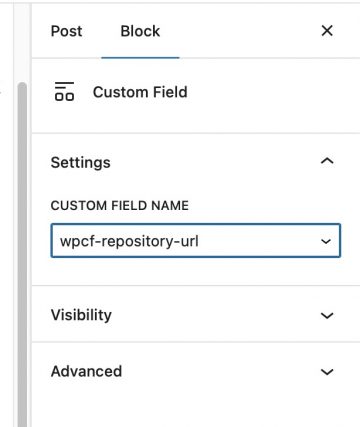
You will now be able to choose which Custom Field’s value you wish to show. The dropdown lists all of the available custom fields you have used across your content. Choose the one you wish and as long as this current post has a value associated with it, then you will see the value appear in the position you placed the block.
The real power of this block, however, comes when you use the custom field block within a Query Loop block’s template. If you have the same custom field added to several posts, perhaps each of those posts has a different value for that field, then you can show the value for each post that appears in your Query Loop.
Go ahead and add a Query Loop and then in the Post Template, add the Custom Field block. Just as above, select the appropriate field name, and you will now see the value for that field for each of the posts shown in your Query Loop.
WP Query Block Extension – Metadata Filter
Natively, the Query Loop block allows you to filter by taxonomy, author, and keyword. These filters allow you to refine exactly which posts or pages are shown as the results of your query. For example, you may only want to show posts that are in a specific category. Or perhaps posts that only contain a specific keyword in the post’s content.
The Metadata Filter extension for the Query Block is a way for you use the Query Loop block to show only posts (or pages) that contain a certain custom field. It’s an incredibly powerful tool, especially when combined with the Metadata Sort Add-on.
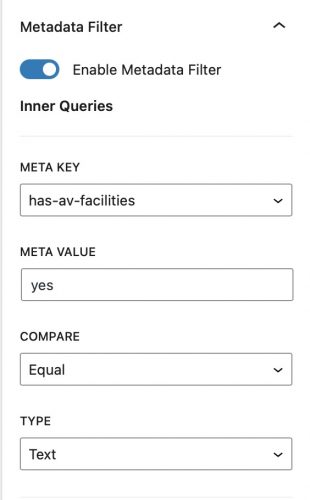
You may have posts on your site that list all of the bookable rooms you have in your buildings. And for each post, it may contain a custom field which signifies if that particular room as A/V facilities or not. i.e. a custom field key of ‘has-av-facilities’ and a value of ‘yes’ if the room does have A/V facilities, and ‘no’ if it does not.
Now, on a page where you list each of your rooms, you may want a section that only displays those rooms that have A/V facilities. You can use the Metadata Filter add-on to do exactly that. Add your query loop and then enable the Metadata Filter. Select the ‘has-av-facilities’ meta keyset the value to be ‘yes’ and the compare to be ‘equal’. Now your Query Loop will only show those posts which have A/V facilities.
WP Query Block Extension – Metadata Sort
Thirdly, and finally for this post, we have developed an add-on which gives you the ability to sort your Query Loop Block results by custom field values.
One common example is you may have your staff or faculty profiles stored as posts on your site and you may have them categorized neatly based on their role or research topic. It’s likely that you have set the title to be the name of the person – almost certainly in the Firstname Lastname format, i.e. a person named Avery Zoolander their profile post’s title would be exactly that — Avery Zoolander.
When creating an archive page which lists all of your staff or faculty profiles, one common thing people often do is try to sort their profiles by last name. Unfortunately, WordPress will sort by the title, and, as the person’s first name is the first word in the title, when sorting alphabetically, you’ll be sorting by their first name, not their last.
What this leads to is missed expectations. One might expect Avery’s post to appear near the end of the list (having a last name of Zoolander) but in fact their profile will appear near the front – having a first name of Avery.
However, if you were to add a custom field to each of your profiles, let’s call it “last-name” for example. And then, as the value of that custom field, for each post, you would put the person’s last name. So the title of the post would still be Avery Zoolander, and for Avery’s post, you would have a custom field with a key of ‘last-name’ and a value of ‘Zoolander’. Repeat this process for each of your profiles.
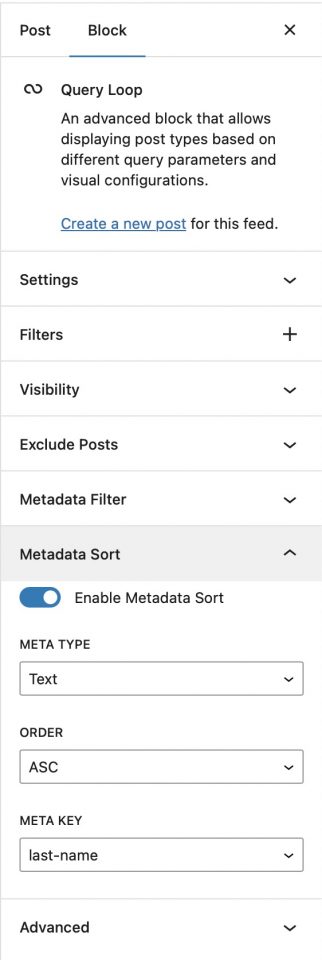
Now, for your query loop on the archive page, add a Metadata Sort. Sort by the ‘last-name’ field. And order ASC (ascending). Avery’s post now appears towards the end of the list, rather than the start.
Enabling the Custom Fields panel in Gutenberg
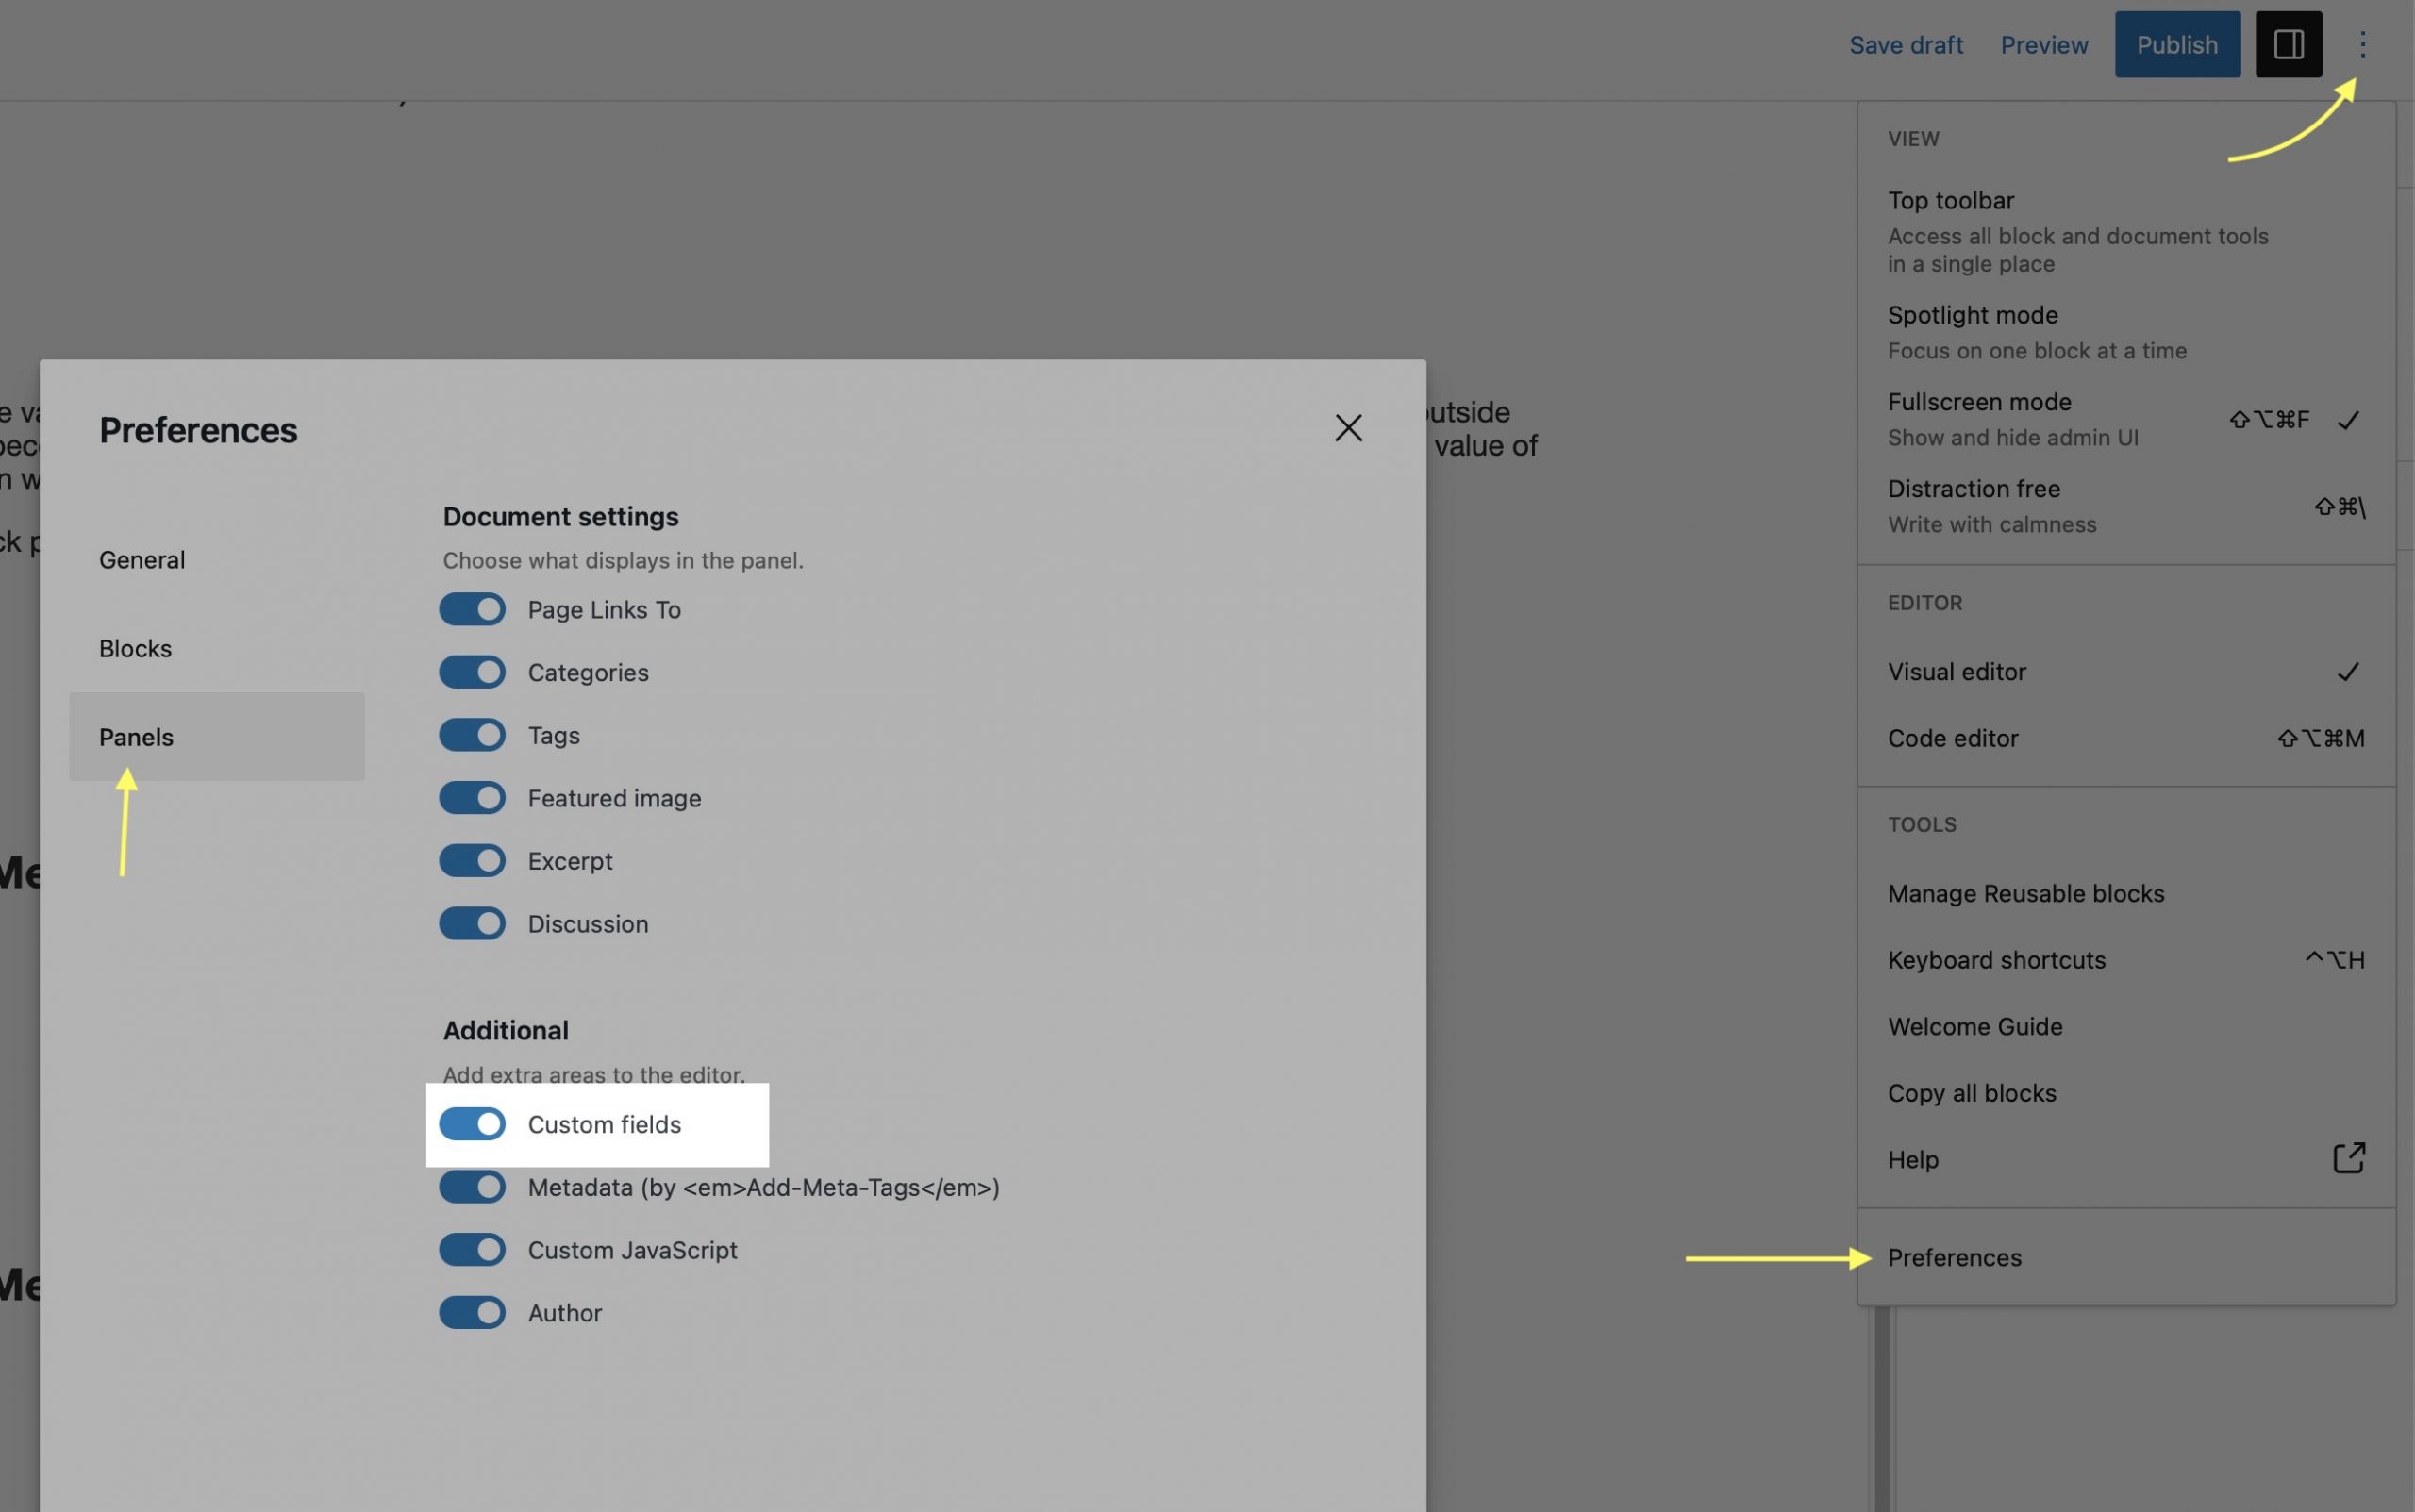
If, when editing a post or a page, you are unable to see the ‘Custom Fields’ panel, you will need to enable it. This can be done by clicking the options menu button (3 vertical dots) in the very top right of the screen. Now click ‘Preferences’. This will show a popover with several options. Click ‘Panels’. Toggle the ‘Custom Fields’ panel on.
Links for these plugins
Custom Field Block: https://repo.code.ubc.ca/ctlt-plugins/ubc-custom-field-block
Metadata Sort Extension: https://repo.code.ubc.ca/ctlt-plugins/wp-query-block-extension-metadata-sort
Metadata Filter Extension: https://repo.code.ubc.ca/ctlt-plugins/wp-query-block-extension-metadata-filter